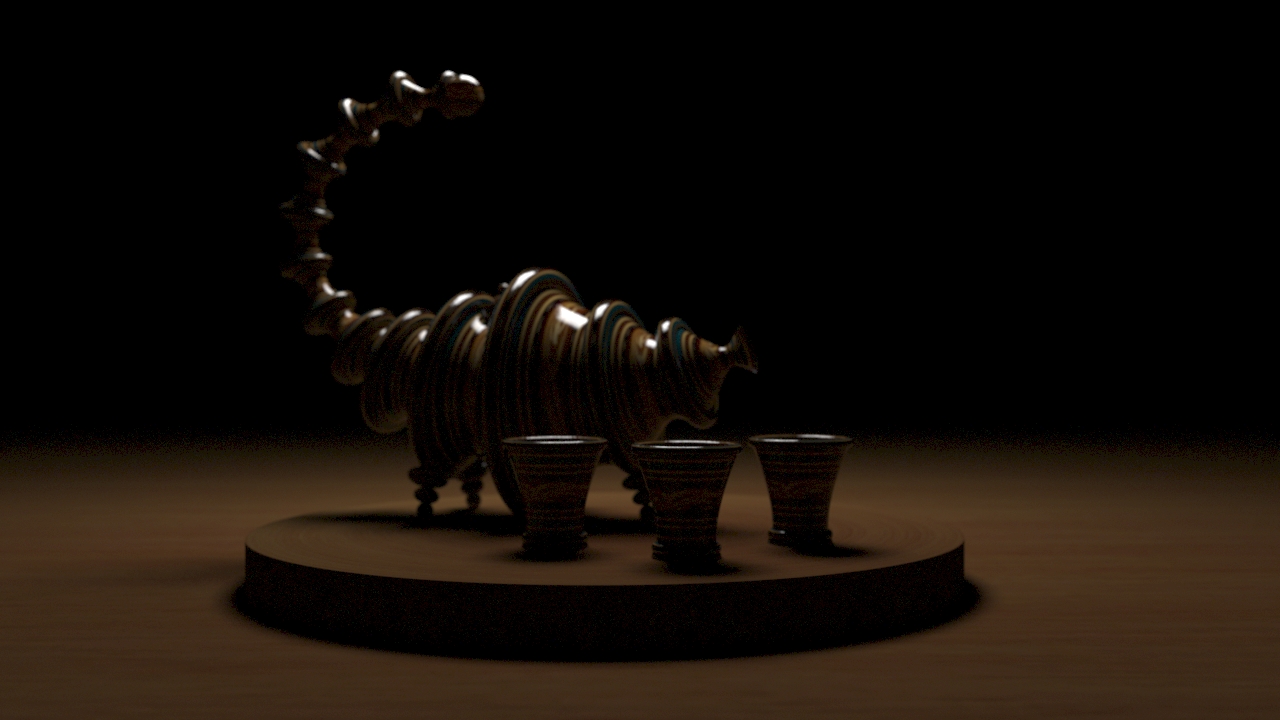


Teapot
RIB Files|RenderMan
Responsible for modeling and lighting. I wrote a rib file in a text editor to create geometry, attributes, lights, and a camera system.
Breakdown Process:
This page demonstrates the basics of how a 3D scene is represented by Pixar's RenderMan scene description (rib file) protocol. In a production environment rib files are generated by applications such as Maya, Houdini and Nuke. However, writing rib files with a text editor focuses attention on the way that geometric primitives, attributes, lighting and coordinate systems are represented by Pixar's RenderMan.
Models are broken down into simple .rib groups and subgroups. ReadArchive opens these groups.
        These group .rib files also contain additional .rib files that make up the model.

        TransformBegin
            Translate -1 2 0
            Rotate 30 0 0 1
            ReadArchive "Teapot.rib"
        TransformEnd
        TransformBegin
            Translate .5 -1 -.5
            Scale .8 .8 .8
            ReadArchive "Teapot_Platform.rib"
        TransformEnd
        TransformBegin
            ReadArchive "Teacup_Group.rib"
        TransformEnd

        An example of the subgroups within Teapot.rib

        AttributeBegin
            TransformBegin
                ReadArchive "Teapot_Body.rib"
            TransformEnd
            TransformBegin
                ReadArchive "Teapot_Body_Rings.rib"
            TransformEnd
            TransformBegin
                ReadArchive "Teapot_Legs.rib"
            TransformEnd
            TransformBegin
                ReadArchive "Teapot_Topper.rib"
            TransformEnd
        AttributeEnd
Basic geometry with minimal shading.
Surface | Displacements | Basic Lighting
One of three cinematic views with a rough depth of field, plus shiny and matte physically plausible shaders.
Since textures are like a game of chance in this language, I've been experimenting with varying textures and rotations of the images for interesting effects to see what works and what doesn't. During the early stages, I like to keep the shading rate at 5 or higher to speed up render time, that way I can quickly flesh out what textures and lights I want in the scene, then refine the details later.
A significant issue that occurred while texturing were seams. Even though the textures were absolutely seamless, I still noticed odd black seams forming on my models. I wondered if the textures I chose weren't seamless after all, but they were when I opened them up in Photoshop to check. My next guess was there was a flaw with the modeling. However, looking at the basic model, there weren't any seams. When I changed the degrees of the disc platform to 370, instead of 360, there was a "reduction" of the seam, but I knew that would just mess with the texture. The solution was the miraculous -mode periodic, which you'll see in the rib below. This phrase, when added to txmake, tells the texture to become tileable. Even though it may be seamless, unless you tell the Renderman language to make it tileable, you'll still have seams.
Above are the seamless textures without -mode periodic. You can see a seam on the platform, and along the backside of the teapot. Below, you can see a beautiful difference once -mode periodic is added into txmake.
# txmake -mode periodic ../tiffs/Teabody.tif ../textures/Teabody.tex
Surface "ppShiny" 	"color diffuseColor" [1 1 1]
				"float diffuseGain" 0.4
				"string surfaceMap" ["Tearing_1.tex"]
Advanced Lighting & Shadows
    RIB 3 Point Lighting

    TransformBegin
        Rotate 160  0 1 0    # orbit
        Rotate 65  1 0 0    # elevation
        Translate 0 0 -20       # distance to world center
        Scale 8 8 1
        LightSource "ppAreaLight" 2 "intensity" 25 #"float bias" 0.009
    TransformEnd

    TransformBegin
        Rotate 0  0 1 0    # orbit
        Rotate 65  1 0 0    # elevation
        Translate 0 0 -20       # distance to world center
        Scale 8 8 1
        LightSource "ppAreaLight" 2 "intensity" 25 #"float bias" 0.009
    TransformEnd

    TransformBegin
        Rotate 0  0 1 0    # orbit
        Rotate 90  1 0 0    # elevation
        Translate 0 0 -20       # distance to world center
        Scale 8 8 1
        LightSource "ppAreaLight" 2 "intensity" 10 #"float bias" 0.009
    TransformEnd
This project was very fun for me. I enjoyed modeling through RIB files and the result of the work is beyond satisfactory. My biggest challenge was fixing the textures, but also trying to visualize camera angles. Without the free ability, like in Maya, to move the camera around wherever I want, there was a lot of trial and error in getting the position of the camera just right. I think that I ought to push myself to create more dramatic camera angles and have them rendered out as well. I would love to continue modeling in RIB files and challenge myself with complicated inspirations or references while learning more about the capabilities RIB files contain.


